Managing Your Weekly Availability on OneForma
Table of Contents:
Setting your weekly availability helps us match you with the right amount of work. When you tell us how many hours you can work each week, recruiters and project managers can assign projects that fit your schedule. This means you won’t be overwhelmed with too much work, and projects stay on track.
The good news? You can update your availability anytime from your profile. Let’s walk through how to set it up.
For Existing Users Already Working on Projects
If you’re already endorsed to a project but haven’t set your hours yet, you’ll see a pop-up when you log in. Here’s what to do:
- Enter the number of hours you can work on OneForma each week (between 0-40 hours)
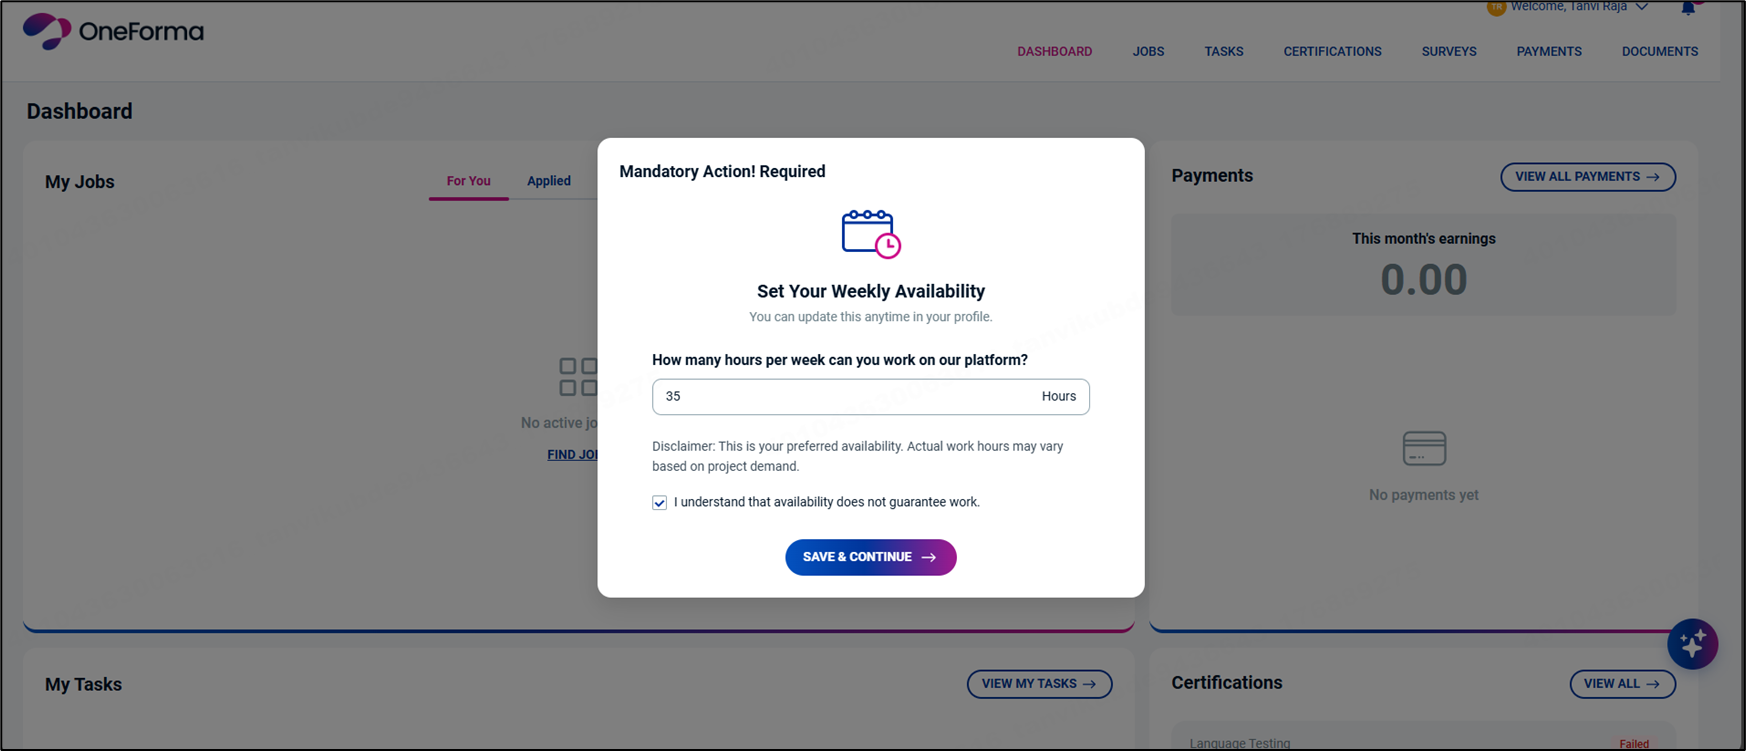
- Read the disclaimer and note carefully
- Select the checkbox to confirm you’ve read and understood the information
- Click Save and Continue
- Click Go to Dashboard
That’s it! Your availability is now set for the entire calendar.
For New Users or Users Not Yet on a Project
You can set your weekly availability directly from your profile whenever you’re ready. Just head to your profile section and follow the steps below.
Setting Your Default Weekly Hours
Your default hours apply to every week in the calendar unless you manually change specific weeks later.
If you’ve already set default hours using the dashboard pop-up, those hours are already applied. You can still make changes by following these steps:
- Click Edit Default Weekly Hours
- Enter your default weekly hours (between 1-40 hours)
- Read the disclaimer and note
- Select the checkbox to confirm
- Click Save Changes
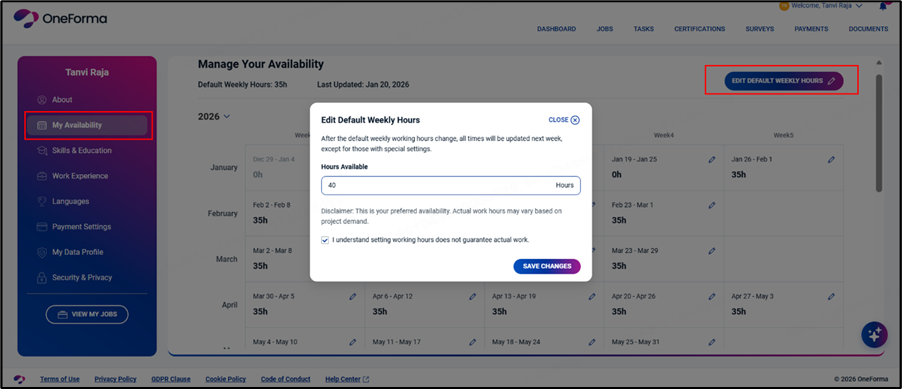
Important: You can’t enter 0 or any number greater than 40 as your default. If you need to mark yourself unavailable for specific weeks, you can do that manually (we’ll show you how below).
Updating Hours for Specific Weeks
Need to adjust your availability for just one week? Maybe you’re going on vacation or have extra time to work? You can customize any week individually.
- Find the week you want to update in your calendar
- Click the Edit icon for that week

- Enter your available hours (0-40 hours)
- Click Save Changes
ood to know: This change only affects the week you selected. Your other weeks stay the same. You can enter 0 if you’re completely unavailable that week.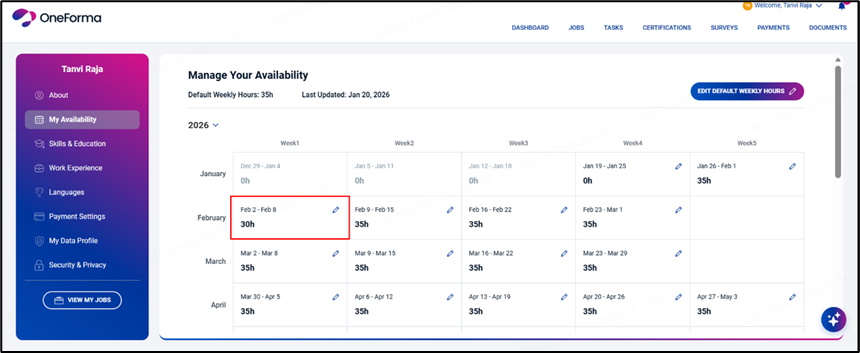
What About My Default Hours?
ere’s how it works: If you change your default working hours later, the new default applies to all weeks except the ones you’ve manually edited. Your manual edits are always protected.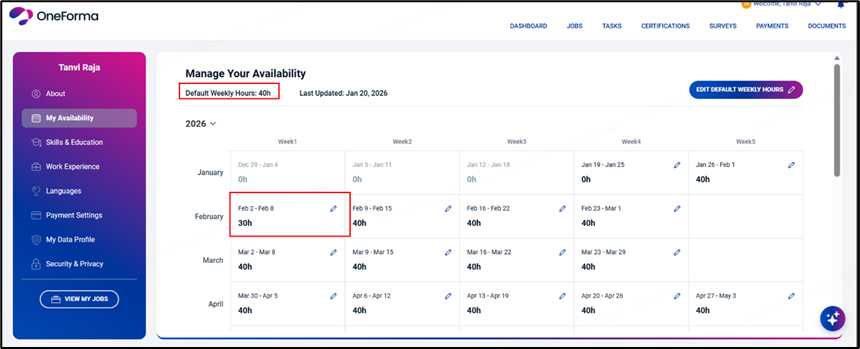
Staying Up to Date
Every four weeks, we’ll prompt you to review your calendar. If everything looks good and you don’t need to make changes, just click “No” and you’re all set.
Need Help?
We’re here to support you! If you have questions about setting your availability or run into any issues, please reach out to our support team. We’ll help you get everything sorted out.